Regular appliance maintenance can help prevent avoidable breakdowns, maintain performance, and extend the useful life of your household appliances. A simple routine of cleaning, inspecting, and checking your appliances can help you spot small problems before they become bigger repair issues.
This appliance maintenance checklist covers the most important maintenance tasks for common household appliances, including refrigerators, dishwashers, washing machines, dryers, ovens, stoves, freezers, range hoods, and microwaves. You’ll learn what to check, how often to check it, what you can safely do yourself, and which warning signs may require professional repair.
Many maintenance tasks are simple, such as cleaning filters, wiping door gaskets, checking accessible hoses, clearing vents, and removing buildup. However, electrical components, gas connections, refrigerant systems, wiring, and internal parts should not be repaired or disassembled unless you are properly qualified.
If you’re a homeowner in Abilene, TX, or a nearby area, use this checklist as a practical year-round guide. Always follow your appliance owner’s manual for model-specific maintenance schedules, cleaning methods, and safety instructions.
Quick Appliance Maintenance Checklist
The easiest way to stay on top of appliance maintenance is to follow a simple routine. You do not need to service every appliance on the same schedule.
Here are the key maintenance tasks to add to your routine:
| Appliance | Specific Maintenance Actions | Suggested Frequency |
|---|---|---|
|
Refrigerator
|
Clean condenser coils, wipe gaskets, check spills/leaks, replace water filter. | Monthly / Recommended |
|
Dishwasher
|
Rinse filter, clear spray arms, wipe door gasket, check for standing water. | Monthly |
|
Washing Machine
|
Check hoses, wipe gasket, clean detergent dispenser, run clean cycle, check leaks. | Monthly |
|
Dryer
|
Clean lint filter after every use, clear surrounding area, check vent airflow and inspect for burning smells. | Every use & as needed |
|
Oven & Stove
|
Wipe spills after cool, clean burners/elements, inspect door gasket, keep vents clear. | Regularly |
|
Freezer
|
Check temperature, wipe door seal, remove frost, clean spills, look for ice buildup. | Monthly |
|
Range Hood
|
Remove and clean grease filter per instructions, wipe surface, check exhaust airflow. | Regularly |
|
Microwave
|
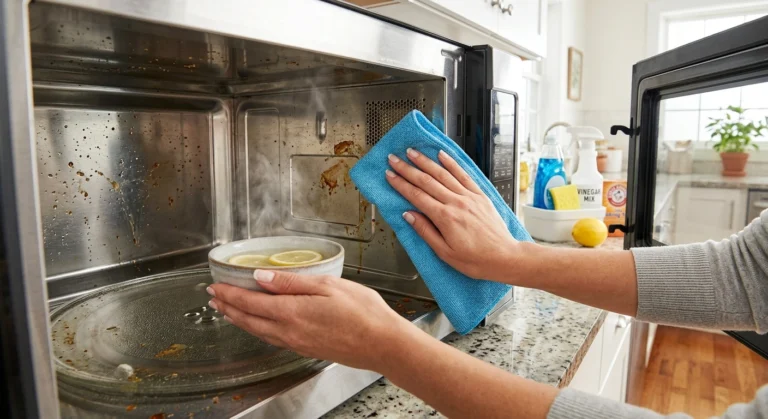
Wipe interior, clean turntable, remove food buildup, inspect door and seal. | Regularly |
Important: Maintenance schedules vary by appliance and model. Always check your owner’s manual before cleaning, removing parts, or performing maintenance.
Simple rule: Clean, inspect, and test your appliances regularly. Small maintenance tasks can help prevent larger problems and may extend appliance life.
Safety Warning Before You Start
Unplug the appliance before performing maintenance whenever the manufacturer’s instructions allow it. Never work on live electrical components, gas connections, refrigerant systems, or internal wiring yourself.
If you smell gas, notice a burning smell, see damaged electrical wiring, or find a serious water leak, stop using the appliance and follow the manufacturer’s safety instructions. When a repair involves electrical, gas, refrigerant, or internal components, contact a qualified appliance repair professional.
Refrigerator Maintenance: 5 Things to Check
Your refrigerator runs every day, so small maintenance tasks can make a big difference. Regular checks can help you spot poor cooling, damaged seals, leaks, and unusual frost before they become bigger problems.
Refrigerator Maintenance Schedule
| Task | How Often | Quick Action | Safety |
|---|---|---|---|
|
Condenser coils
|
Every 6–12 months* | Clean dust and debris if the coils are accessible. | Follow the manufacturer’s instructions and unplug the refrigerator if required before cleaning. |
|
Door gaskets
|
Monthly | Wipe the seals clean and check for cracks, gaps, or damage. | Do not pull or remove the gasket unless the owner’s manual provides instructions. |
|
Water filter
|
As recommended* | Replace the filter and follow the manufacturer’s reset and flushing instructions. | Use the correct replacement filter and follow the manufacturer’s instructions to prevent leaks. |
|
Leaks
|
Monthly | Check underneath and around the refrigerator for water or recurring moisture. | Do not remove panels or attempt to repair water lines or internal components yourself. |
|
Excess frost & air vents
|
Monthly | Check for unusual frost and make sure internal air vents are not blocked by food. | Never use sharp tools or unauthorized heat to remove frost. Follow the manufacturer’s defrosting instructions. |
Dishwasher Maintenance: 5 Things to Check
Keep your dishwasher running smoothly by checking a few key areas throughout the year. Clean the filter, clear the spray arms, wipe the door gasket, check drainage, and look for leaks as part of your routine maintenance.
Use the schedule below to see what to check and when to check it. Before removing any parts or using a cleaning product, follow the maintenance instructions in your owner’s manual.
Dishwasher Maintenance Schedule
| Task | How Often | What to Do | Safety |
|---|---|---|---|
|
Clean filter & interior
|
Monthly* | Clean the filter, remove food debris, and wipe away interior buildup. | Turn off the dishwasher before removing or cleaning the filter. |
|
Check spray arms
|
Monthly | Clear debris from spray-arm openings and make sure they rotate freely. | Make sure the dishwasher is off before handling the spray arms. |
|
Clean door gasket
|
Monthly | Wipe away food residue and check for cracks or gaps. | Avoid sharp tools that could damage the gasket or cause injury. |
|
Check drainage
|
Monthly | Look for unusual standing water and clear accessible debris. | Do not reach into deep or inaccessible areas; turn off power before inspection. |
|
Check for leaks
|
Monthly | Inspect around the door and underneath the dishwasher for water. | If you notice water near electrical connections, switch off power and seek professional help. |
Washing Machine Maintenance: 5 Things to Check
Keep your washing machine working properly by checking the hoses, door or lid gasket, detergent dispenser, drum, and drainage area regularly. These simple maintenance tasks can help prevent leaks, reduce buildup and odors, and keep wash cycles running properly.
Use the schedule below to know what to check, how often to check it, and what action to take. Always follow your owner’s manual for model-specific cleaning methods and maintenance intervals.
Washing Machine Maintenance Schedule
| Task | How Often | What to Do | Safety |
|---|---|---|---|
|
Check water hoses
|
Monthly | Inspect hoses for cracks, bulges, leaks, or loose connections. | Turn off the water supply before replacing or disconnecting a hose. |
|
Clean door or lid gasket
|
Monthly | Wipe away dirt and detergent buildup and check for damage. | Keep fingers clear of moving parts and make sure the machine is off before cleaning. |
|
Clean detergent dispenser
|
Monthly | Remove detergent residue and rinse the dispenser according to the manual. | Do not mix cleaning products or chemicals. Follow the manufacturer’s instructions. |
|
Clean drum
|
Monthly or as recommended* | Run the manufacturer’s recommended cleaning cycle and leave the door or lid open afterward when appropriate. | Never reach into the drum while it is moving. Keep children away from an open washer. |
|
Check drainage
|
Monthly | Inspect the accessible drain area for debris and watch for slow draining or standing water. | Turn off and unplug the washer before inspecting or cleaning accessible drainage components. |
Dryer Maintenance: 5 Things to Check
Keep your dryer operating safely and efficiently by checking the lint filter, dryer vent, exhaust airflow, surrounding area, and power cord regularly. These simple maintenance tasks can help reduce lint buildup, maintain proper airflow, and identify potential safety problems early.
Use the schedule below to know what to check, how often to check it, and what action to take. Always follow your owner’s manual for model-specific cleaning and maintenance instructions.
Dryer Maintenance Schedule
| Task | How Often | What to Do | Safety |
|---|---|---|---|
|
Clean lint filter
|
After every use | Remove lint from the filter after each drying cycle. | Never operate the dryer without the lint filter installed. |
|
Check dryer vent
|
Regularly* | Look for lint buildup, crushed sections, or restricted airflow in accessible areas. | Turn off and unplug the dryer before inspecting accessible vent connections. |
|
Check exhaust airflow
|
Regularly | Watch for weak airflow or unusually long drying times. | Do not operate the dryer if you notice a burning smell, excessive heat, or another serious warning sign. |
|
Clear surrounding area
|
Monthly | Remove lint, dust, clothing, and other materials from around and behind the dryer. | Keep flammable materials away from the dryer and exhaust area. |
|
Inspect power cord
|
Monthly | Check the cord and plug for fraying, melting, scorch marks, or other visible damage. | Do not use the dryer with a damaged cord or plug; have it inspected by a qualified professional. |
Oven & Stove Maintenance: 5 Things to Check
Keep your oven and stove working safely by checking spills and food buildup, burners or heating elements, the oven door gasket, vents, and power or gas connections regularly. These simple maintenance tasks can help maintain cooking performance and identify problems before they become more serious.
Use the schedule below to know what to check, how often to check it, what action to take, and when extra caution is needed. Always allow the appliance to cool completely before cleaning and follow your owner’s manual for model-specific instructions.
Oven & Stove Maintenance Schedule
| Task | How Often | What to Do | Safety |
|---|---|---|---|
|
Clean burners and burner caps
|
Monthly | Remove loose food debris and wipe burner caps. For gas stoves, make sure burner openings are free from buildup so the flame stays even. | Make sure the burners are off and completely cool before cleaning. |
|
Check oven door seal
|
Monthly | Inspect the gasket around the oven door for cracks, tears, looseness, or heavy buildup. Clean it gently if needed. | Do not pull, stretch, or remove the gasket unless the manufacturer allows it. |
|
Clean the oven interior
|
Every 1–3 months | Remove food spills and grease buildup. Use the cleaning method recommended in your owner’s manual. | Never use harsh chemicals or abrasive tools unless approved by the manufacturer. |
|
Inspect power cord and connections
|
Every 3 months | Check for fraying, melting, scorch marks, loose connections, or other visible damage. | Do not use the appliance if the cord or electrical connection is damaged. Have it inspected by a qualified professional. |
|
Check oven temperature and heating performance
|
Every 6 months | Watch for uneven cooking, unusually long preheating, undercooked food, or temperatures that seem inconsistent. | If you notice burning smells, sparks, gas odor, or other unusual symptoms, turn off the appliance and seek professional help. |
Freezer Maintenance: 5 Things to Check
Keep your freezer working efficiently by checking the temperature, door gasket, frost buildup, interior, and air vents regularly. These simple maintenance tasks can help maintain consistent cooling, reduce unnecessary frost, and identify problems before they become larger repair issues.
Use the schedule below to know what to check, how often to check it, what action to take, and when extra caution is needed. Always follow your owner’s manual for model-specific maintenance and cleaning instructions.
Freezer Maintenance Schedule
| Task | How Often | What to Do | Safety |
|---|---|---|---|
|
Check temperature
|
Monthly | Check the freezer temperature using the appliance display or a suitable thermometer if recommended. | Follow the manufacturer’s recommended temperature and adjustment instructions. |
|
Check door gasket
|
Monthly | Wipe the seal clean and check for cracks, gaps, or areas that do not seal properly. | Do not pull or remove the gasket unless the owner’s manual provides instructions. |
|
Check frost buildup
|
Monthly | Look for unusual or excessive frost around the walls, shelves, or door area. | Do not chip away frost with sharp tools or use heat unless specifically approved by the manufacturer. |
|
Clean interior
|
Monthly / as needed | Remove expired food, wipe spills, and clean accessible surfaces according to the manual. | Disconnect power when required by the manufacturer’s cleaning instructions. |
|
Keep air vents clear
|
Monthly | Make sure food packages are not blocking internal vents or restricting air circulation. | Do not cover or obstruct freezer vents. |
Range Hood Maintenance: 5 Things to Check
Keep your range hood working effectively by checking the grease filter, exhaust vent, fan, exterior surfaces, and surrounding area regularly. Routine cleaning can help reduce grease buildup and maintain proper airflow while cooking.
Use the schedule below to know what to check, how often to check it, what action to take, and when extra caution is needed. Always turn off the range hood before cleaning and follow your owner’s manual for model-specific instructions.
Range Hood Maintenance Schedule
| Task | How Often | What to Do | Safety |
|---|---|---|---|
|
Clean grease filter
|
Monthly* | Remove and clean the filter according to the manufacturer’s instructions. | Turn off the hood and allow nearby surfaces to cool before cleaning. |
|
Check exhaust vent
|
Monthly | Look for visible grease or debris that could restrict airflow. | Do not reach into inaccessible ductwork or attempt electrical repairs. |
|
Check fan operation
|
Monthly | Turn on the fan and listen for unusual noises or weak airflow. | Stop using the hood if you notice burning smells, smoke, or electrical problems. |
|
Clean exterior surfaces
|
Weekly / as needed | Wipe away grease and food residue from accessible surfaces. | Avoid spraying cleaner directly onto electrical controls or openings. |
|
Check surrounding area
|
Monthly | Look for excessive grease buildup around the hood, filters, and nearby surfaces. | Keep grease and other flammable buildup under control and follow the manufacturer’s cleaning instructions. |
Microwave Maintenance: 5 Things to Check
Keep your microwave clean and working properly by checking the interior, turntable, door, door seal, and ventilation openings regularly. Removing food buildup and checking for visible damage can help maintain safe and reliable operation.
Use the schedule below to know what to check, how often to check it, and what action to take. Always unplug the microwave before cleaning when the manufacturer’s instructions require it, and never attempt to repair internal components yourself.
Microwave Maintenance Schedule
| Task | How Often | What to Do | Safety |
|---|---|---|---|
|
Clean interior
|
Weekly / as needed | Wipe away food splatters, grease, and spills from accessible surfaces. | Allow hot surfaces and food residue to cool before cleaning. |
|
Clean turntable
|
Weekly | Remove and wash the turntable according to the manufacturer’s instructions. | Handle the glass turntable carefully to prevent breakage. |
|
Check microwave door
|
Monthly | Inspect the door for visible damage and make sure it closes properly. | Do not use the microwave if the door is damaged or does not close correctly. |
|
Check door seal
|
Monthly | Wipe the seal area clean and look for visible damage or deterioration. | Do not attempt to repair or modify the door or seal yourself. |
|
Keep ventilation clear
|
Monthly | Remove dust or debris from accessible ventilation openings. | Do not block ventilation openings or insert objects into them. |
Seasonal Appliance Maintenance Checklist
Seasonal maintenance is a good opportunity to check appliances for dust, buildup, leaks, restricted airflow, and other changes in performance that may not be obvious during everyday use. A few minutes of inspection can help you identify small problems before they turn into unexpected repair needs.
Use the schedule below when changing seasons or preparing appliances for periods of heavier use. Always follow your owner’s manual for appliance-specific maintenance instructions.
Seasonal Appliance Maintenance Schedule
| Task | How Often | What to Do |
|---|---|---|
|
Check appliance condition
|
Every 3–6 months | Look for leaks, unusual noises, damaged seals, rust, or other visible changes. |
|
Clean filters and vents
|
Every 3–6 months* | Check accessible filters, vents, and airflow areas for dust, lint, grease, or debris. |
|
Inspect hoses and connections
|
Every 3–6 months | Check accessible water hoses and connections for cracks, bulges, corrosion, or leaks. |
|
Clean and organize interiors
|
Every 3–6 months | Remove expired food, clean spills and buildup, and keep internal vents unobstructed. |
|
Review appliance performance
|
Every 3–6 months | Watch for longer cycles, poor cooling, weak airflow, unusual odors, or changes in heating or cleaning performance. |
Appliance Warning Signs You Shouldn’t Ignore
Regular maintenance can help you spot problems before an appliance stops working completely. However, some warning signs indicate that cleaning or basic maintenance may not be enough.
If you notice any of the following appliance warning signs, stop using the appliance when appropriate and follow the manufacturer’s safety instructions:
DIY Appliance Maintenance vs. Professional Repair
Many appliance maintenance tasks are simple enough for homeowners to handle, such as cleaning filters, wiping door seals, checking accessible hoses, and keeping vents clear. However, maintenance should not turn into an unsafe repair attempt.
Use the guide below to decide what you can safely check yourself and when to stop and contact a qualified appliance repair professional.
What You Can Usually Do Yourself
| Maintenance Task | Examples | Safety Reminder |
|---|---|---|
|
Clean filters
|
Refrigerator filters, dishwasher filters, dryer lint filters | Follow the manufacturer’s cleaning instructions. |
|
Clean seals and gaskets
|
Refrigerator, freezer, dishwasher, and washing machine seals | Use the recommended cleaning method and check for damage. |
|
Clean accessible surfaces
|
Appliance interiors, spills, grease, and food residue | Turn off or unplug the appliance when required before cleaning. |
|
Check accessible hoses
|
Washing machine and dishwasher water hoses | Look for visible cracks, bulges, loose connections, or leaks. |
|
Keep vents clear
|
Dryer, refrigerator, freezer, oven, and range hood vents | Never block ventilation openings or insert objects into them. |
When to Call a Professional
Contact a qualified appliance repair professional when the problem involves internal electrical components, gas connections, refrigerant systems, heating elements, wiring, or other parts that require specialized knowledge or tools.
Safety rule: If you are unsure whether a maintenance task is safe, stop and check the owner’s manual or contact a qualified professional. Never remove appliance panels or work on live electrical, gas, refrigerant, or internal components unless you are properly qualified to do so.
When Appliance Maintenance Is No Longer Enough
A good rule is simple: maintenance helps prevent problems, but it does not replace repairs when a component has failed.
Do not remove covers, bypass safety features, or attempt to repair electrical, gas, refrigerant, or other internal components unless you are properly qualified. When a problem is beyond routine maintenance, follow the appliance manufacturer’s instructions and contact a qualified appliance repair professional.
Need Appliance Repair in Abilene, TX?
Regular appliance maintenance can help prevent avoidable problems, but some issues require professional diagnosis and repair. If your refrigerator, dishwasher, washing machine, dryer, oven, stove, freezer, or another household appliance isn’t working properly, don’t ignore recurring problems.
Abilene Appliance Expert provides appliance repair help for homeowners in Abilene, TX. If basic maintenance hasn’t resolved the issue, call 325-306-1691 to discuss the problem and find out what to do next.
Final Takeaway
A simple appliance maintenance routine can help you catch small problems before they become larger repair issues. Focus on the tasks that matter most for each appliance, including cleaning filters and buildup, checking seals and hoses, keeping vents clear, and watching for changes in performance.
Use this appliance maintenance checklist as a regular reminder, but always follow your owner’s manual for the correct cleaning methods, maintenance intervals, and safety instructions.
When an appliance shows serious warning signs or continues to have problems after routine maintenance, stop using it when appropriate and seek help from a qualified appliance repair professional.